Version control with Git
A short, follow-along guide to tracking your work with Git and reading diffs, for the age of AI-assisted coding.
the problem
You already know why you need this
Picture your thesis folder.
In it, you might have files like paper_final.do, paper_final_v2.do, paper_final_USE_THIS.do, and paper_final_v2_actually.do. You need to update Figure 3, but you can't remember which script created it. One of the .do files is broken, and it's 11 p.m. the night before your submission deadline.
We've all had this folder and this experience, and it's not a fun one. Git is the way out, and the best part is how little of it you need: a handful of commands gets you most of the payoff. Open a terminal and follow along (reading about git works about as well as reading about swimming).
One more reason to use git, which matters more every day: when you put a chunk of your code into an AI chat window and it hands you back a "fixed" version, git helps you see exactly what it changed, which is great for understanding the fix... and for undoing it if it turns out to be wrong.
follow along
Build a real repository
The fastest way to learn git is to use it. So let's install git, set it up, start a repository, and save a couple of snapshots, so that you try out all the most useful commands.
Install git
First you need git itself. On **Windows**, download Git for Windows from git-scm.com and accept the defaults. This will also install Git Bash, the terminal that you'll type in. On a **Mac**, run xcode-select --install in the Terminal app, or download from the same site. To check that it worked, open bash (Windows) or the terminal (Mac) and run:
git --version # prints the version if git is installedSet up git, once per computer
Before starting a repository, you should tell git who you are, so that it can sign your snapshots with your name. You only need to do this once on a given computer:
git config --global user.name "Your Name"
git config --global user.email "you@example.com"
git config --global init.defaultBranch main   # new repos start on a branch called "main"
On Mac, you do all this in the built-in Terminal app. On Windows, you should use Git Bash, not PowerShell.
Start a repository
Make a folder for your project, move into it, and turn it into a repository:
mkdir thesis    # create a project folder
cd thesis       # "move" into it, i.e. tell git to use this as working directory
git init        # start tracking this folder with git
That creates a hidden .git folder where your whole history will live. You never need to open this folder yourself.
Save your first snapshot
Make a file to track, then check the state of things.
git status answers "what's been going on in this folder?", and it's the command that you'll run most often:
echo "use survey_data, clear" > clean.do   # create a one-line file
git status                                 # see what has changed
Saving a "snapshot" takes two steps, which can be a bit confusing: you first have to "stage" the change that you want to save using git add, and then you "record" it with git commit.
In Git, "staging" is the process of selecting which changes you want to group together. Committing is then permanently saving that group as a snapshot of your project. You can think of staging as an online shopping cart, and committing like clicking "buy" (i.e., save all these chages together as a snapshot).
The message that you type after -m is your note to future-you about what's in this snapshot:
git add clean.do                              # stage: mark this file to be saved
git commit -m "Add initial cleaning script"   # commit: record the snapshot
That's your first commit.
Change something, then save again
Snapshots only help if you take them often. Change the file, look at what's different, and commit again:
echo "keep if year >= 2010" >> clean.do   # add a line to the file
git diff                                  # show what changed since the last commit
git add clean.do                          # stage the change
git commit -m "Restrict sample to 2010 onward"
git diff is SUPER useful, and we'll go over how to read it in the next section. To see the snapshots you've taken so far, type:
git log --oneline # list your commits, newest firstEach line is a labeled snapshot that you can return to. That's the whole loop: change, check, stage, commit. Everything else on this page is a variation on it.
before you go online
Keep data out of git
Some files should never go into git: your data, anything confidential, and the junk that your software leaves behind.
This matters most for data. Once you push a file to GitHub, it lives on someone else's server! Even if you delete it later, it lingers in the history. Proprietary survey data, anything with personal information, API keys pasted into a script: these are all examples of things you never want to leave your computer. The fix is a file named .gitignore, which lists the things that git should skip.
How a .gitignore works
A .gitignore is a plain text file with one pattern per line. Git checks every file against those patterns and quietly ignores the matches. Three kinds of pattern cover almost everything:
-
*.tex: the*is a wildcard that stands for any name, so this ignores every file ending in.tex. -
data/: a trailing slash means a folder, so git ignores everything inside the folder calleddata/. -
secret_key.txt: a plain name ignores exactly that one file.
Make one
Create it at the top of your repository, then commit it so that anyone who clones the repository inherits the same rules:
echo "data/" > .gitignore   # ignore the data folder
echo "*.dta" >> .gitignore   # and every .dta file
echo "*.csv" >> .gitignore   # and every .csv file
git add .gitignore
git commit -m "Ignore data files"
One catch: .gitignore only stops git from tracking files it isn't already tracking. If you committed a data file before adding it to .gitignore, git keeps tracking it. Tell git to forget it, which leaves the file on your disk, then commit:
git rm --cached data.csv   # stop tracking it, keep the file
git commit -m "Stop tracking data.csv"*.xlsx, *.sav, *.RData, and so on. The rule of thumb: if you wouldn't email it to a stranger, it belongs in .gitignore. Here's a fuller starter file that also ignores the temporary files Stata, R, and your operating system scatter around. Save it as .gitignore at the top of your repository and edit to taste:
See what's in it
# Data: never commit raw or confidential data
data/
*.dta
*.csv
*.xlsx
*.sav
*.RData

# Logs and temporary output
*.log
*.smcl
*.tmp

# Operating-system and editor clutter
.DS_Store
Thumbs.db
*~

# Secrets: API keys, passwords, tokens
.env
secrets*a superpower
Learn to read a diff
Here's the single most useful thing on this page. A diff is git showing you, in red and green, exactly what changed in a file that you just committed. That's it.
Reading a diff can help you figure out why your regression no longer runs (hint: that edit you made at 1 a.m. last Tuesday), and how you can make sure you remain the author of your own project even if you're leaning on AI to help troubleshoot your code.
Two commands: git diff shows you what you've changed but haven't yet staged; git diff --staged shows you what you've staged and what you are about to commit. A leading - marks a red line you removed; a leading + marks a green line you added. A line that you have edited appears as both, stacked.
I prefer to read diffs on GitHub, where a single new line will look like this:
and a changed line shows the old version in red above the new one in green:
The diff shows you what changed, so make your commit messages useful to future-you. They should say what you've done in words, to make the history readable later on. Compare a useless message to a helpful one:
# Vague: useless to future-you
git commit -m "update"

# Clear: says exactly what changed
git commit -m "Drop duplicate household IDs before the merge"going online
Put it on GitHub
So far this lives only on your laptop. GitHub gives it a backup, a home, and a way to share it.
Connect your repository to GitHub
On github.com, click New, name the repository, and leave it completely empty. Don't let GitHub add a README or a .gitignore for you. If it creates even one file, the repository starts its own separate history, and GitHub will reject your first push with a confusing error.
GitHub will then give you a URL ending in .git. Connect your local repository to it and send your commits up:
git remote add origin https://github.com/yourname/thesis.git   # link to GitHub
git branch -M main         # name your branch "main"
git push -u origin main # send commits up, and remember this linkorigin is just the conventional name for your GitHub copy, and -u remembers the link, so from now on a bare git push does the job. Refresh the GitHub page and your files and history are sitting there.
Your everyday routine
This will be your main workflow: every time you sit down to work, you run the same short loop:
git pull                  # 1. start from the latest version on GitHub
# ... edit your files ...
git status                # 2. what did I change?
git diff                  # 3. read the changes
git add clean.do          # 4. stage the code changes that you want to keep
git commit -m "Winsorize income before running regression"   # 5. save a snapshot
git push                  # 6. send it to GitHub
Pull at the start so you begin from the latest version. Work. Then stage, commit, and push when you reach a natural stopping point. You can't push what you haven't committed, and you can't commit what you haven't staged. That's why the order matters. Pull while your working tree is clean; if git complains about local changes, commit them first.
working with others
Share it with a supervisor or co-author
Once your repository is on GitHub, it's the easiest way to show a supervisor or co-author exactly what you did. No more zipping files or pasting code into an email that mangles the formatting.
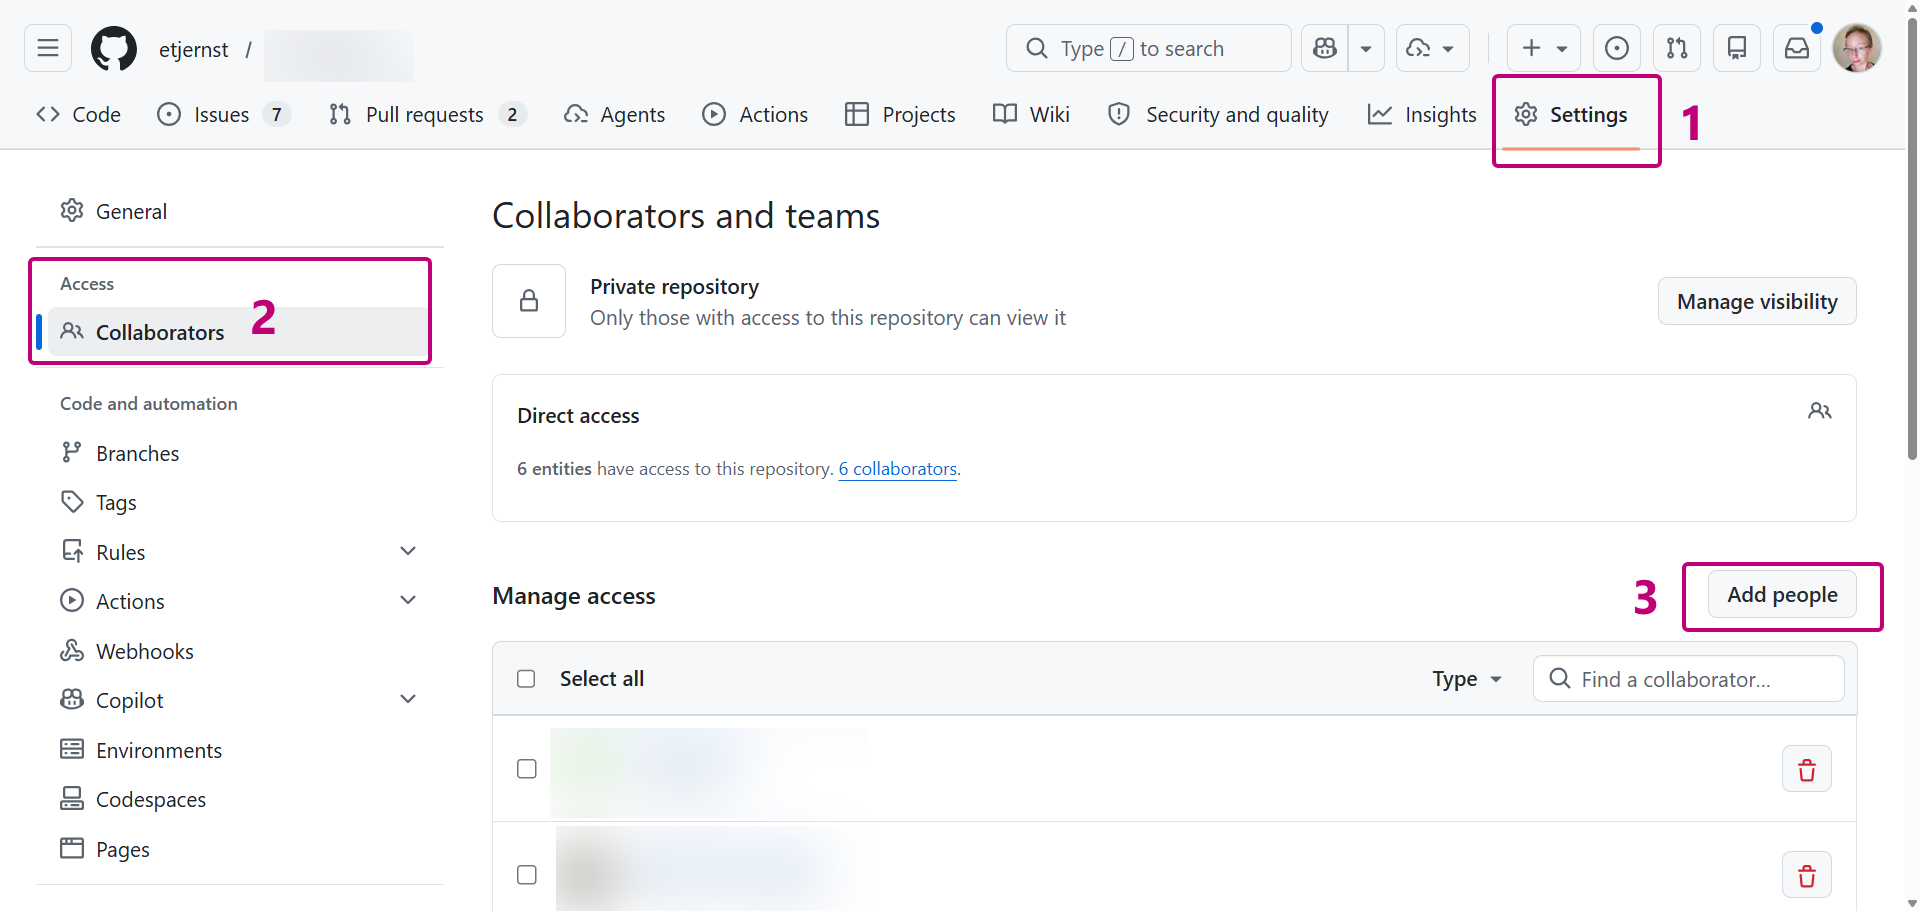
First, give the other person access. On your repository page, open Settings, then Collaborators, and add them by their GitHub username. They get an invitation, and once they accept they can see everything in the repository, including the full history.
Now the cool bit: GitHub lets you link to specific lines within a file and easily send that link in an email. Instead of "the code for Figure 3 is somewhere in my analysis script," you can send a link that opens at precisely that line:
- Open the file on GitHub and click the number next to the line where the code starts. Shift-click a second line number to select a range.
- The address bar updates with the lines, something like
.../analysis.do#L42-L60. - Copy that link and paste it into your email. It will open right at the code you wanted to share.

y on the keyboard before you copy (or click "copy permalink"), and GitHub rewrites the address into a permalink tied to the current commit. That link keeps pointing at the same code even if you edit the file later! (I told you this was going to be cool!)Even better: open an issue and keep the discussion next to the code
An issue is a little discussion thread attached to your repository, made for exactly this. Click the Issues tab, then New issue, write what you want a second opinion on, and paste your line link into the description. Your supervisor gets a notification, replies in the thread, and the whole conversation lives next to the code instead of scattered across your inbox.
Paste a code link into an issue and GitHub expands it into a preview of those exact lines, so whoever's reading doesn't even have to click through.
undo
When it goes wrong, and it will
The reward for committing often is that mistakes stop being scary. Say that you let an AI rewrite your whole cleaning script and now it's broken and you can't figure out why. With a single command, you can throw away the mess and get teleported back to your last commit:
git restore clean.do   # just this file
git restore .          # everything uncommitted
Anything you committed is safe; only your uncommitted edits to tracked files vanish.
If you've already run git add on the broken version, you will need to use git restore --staged --worktree . instead, which undoes the staged and unstaged changes together.
With that caveat, this is the command that lets you be brave. Try the wild idea, and if it flops, git restore . and you're back to the "safe" version of your code.
the modern bit
Git in the age of AI
An AI will hand you code that's fast, confident, and occasionally wrong in ways that are easy to miss. The single most important habit has nothing to do with git: make sure that you understand any code an AI gives you before you use it. If you can't explain what a line does, it should not be part of your thesis---no matter who or what wrote it.
Git can help make this an easy and safe habit:
1. Commit immediately before you paste in a big rewrite
If you have committed a clean snapshot that you know works, then whatever the AI suggests is one git restore . away from being undone, so you can try stuff without fear.
2. Read the diff of what the AI suggested
Sometimes when you ask AI to fix a simple problem, it gives you back 40 new lines of code with a lot of complicated loops and "unit tests" and emojis in the comments. git diff shows you exactly what changed compared to your previous commit, so that you can inspect it before it becomes part of your project. Reviewing the diff is now a bigger part of the work than typing the lines ever was.
3. Let it help you fix errors
When a command fails (in git or in Stata or in Python), copy over the error message together with the few lines that produced it, paste both into the AI, and ask what went wrong. The exact error text is the most useful thing that you can hand an AI. And because you committed first, you can try its suggested fix, read the diff, and git restore . if it makes things worse.
A worked example: "I pushed, but nothing changed on GitHub"
This one trips up almost everyone. You edit clean.do, run git push, and the terminal says:
Everything up-to-dateYour changes are nowhere on GitHub, and the message gives no hint why. Paste exactly that into the AI:
I edited my file and ran git push, but git says
"Everything up-to-date" and my changes are not on GitHub. Why?
It will tell you what the everyday routine already showed: git push only uploads commits, and you never made one. The three steps you skipped fix it:
git add clean.do
git commit -m "Add winsorizing step"
git push
This will remind you that `push` is the last step, not the only step. But whenever an error leaves you stuck, pasting it word for word into an AI is the fastest way to learn what it means.
keep this
The whole thing on one card
| Command | What it does |
|---|---|
git init | Start tracking the current folder |
.gitignore | A file listing what git should never track (data, secrets) |
git status | Show what changed and what is staged |
git add <file> | Stage a file for the next commit |
git add . | Stage everything that changed |
git commit -m "msg" | Record the staged changes as a snapshot |
git diff | Show unstaged changes, line by line |
git diff --staged | Show what you're about to commit |
git log --oneline | List past commits, compactly |
git restore . | Discard uncommitted changes |
git push / git pull | Send commits to GitHub / bring them down |
If you remember nothing else: commit small, commit often, and read the diff before every commit. That one habit will save you more grief than every advanced feature combined.